
D.I.Y : Nail polish racks
6:02 PM
Have you always wanted some nail polish racks to play it big like some salons ?
The main reason behind this little DIY, was the fact that ever since I had my room done recently, the nailpolishes that were stored in my office room were now stored in some shoebox. I always was big on well polished nails and nice hands but as college came (and let's face it, I only brought a couple of polishes into my dorm) I was getting kind of lazy with my nails. My big solution ? Get a rack so that I could finally see those little bottles and give my nails some love.
I couldn't find any decent acrylic racks in France and after a little digging on Pinterest, I found a really cheap, decent but definitely non-cheap looking way to store my nailpolishes.
I had on my hands roughly 60-70 nailpolishes (counting some old and unused ones as well), and a little trip to IKEA and some local hardware store was all I needed to get this on.
(PS : Please excuse the low quality of the pictures, this post wasn't intended, hence the quality and lack of pictures altogether)
Un présentoir de vernis à ongles, ça vous dit ?
La raison principale derrière ce petit projet DIY, Après avoir refaite ma chambre, les vernis qui se trouvaient dans ma salle de bureau étaient maintenant tous dans une grande boite à chaussure. J'ai toujours été quelqu'un qui accorde beaucoup d'importance aux ongles bien vernis et aux belles mains en général mais les études supérieures (ajoutons à cela que je n'avais emmené que quelques bouteilles à mon logement étudiant) ont fait que je suis devenue très paresseuse avec mes ongles. La solution ? Trouver un rangement pour que je puisse enfin avoir les avoirs sous les yeux et me souvenir de les utiliser.
Je n'ai pas pu trouver de rangement en acrylique en France et après une petite recherche sur Pinterest, j'ai trouvé une idée pas cher, sympa et pas cheap-looking du tout. J'avais à peu près plus de 60-70 bouteilles à ranger et après un petit tour chez le Suédois et Castorama, j'ai pu commencer ce DIY.
(Veuillez svp excuser la qualité médiocre des photos, je n'avais pas prévu de faire cette article)
WHAT YOU'LL NEED
- Bekväm racks from Ikea : 3,50€
- Spray paint : Roughly 7€
- Either glue and a glue-gun or screwdrivers (However you decide to hang the racks)
TOTAL COST : 3,50 x 4 + 7 = 21€
The Bekväm racks were originally designed to hold spices, so you'll find it in the kitchen section, but like all racks, you can do pretty much anything with it. I decided to get 4 and spray paint to go with it to personalize a bit those dull looking racks.
Les étagères Bekväm sont normalement destinées à ranger les épices dans la cuisine mais comme tout étagères, vous en faites un peu comme vous le voulez (vous les trouverez donc dans la partie cuisine de chez Ikea).

The racks are fairly easy to build and takes roughly 5 mins each to be built.
Les étagères sont faciles à monter, il faut compter à peu près 5 mins par étagère.

To go with the brown, blue and silver , I chose a magenta almost red color to complement to touches of magenta I've placed in my bedroom.
J'ai acheté cette peinture magenta en spray chez Bricorama pour environ 7€ - si je me souviens bien-.

2 layers were sprayed on these with an hour to an hour and a half between two coats to let it fully dry.
Deux couches ont été peintes sur chaque étagères en espaçant chaque couche d'1h à 1h30 environ pour laisser bien sécher.
The racks can be glued to the wall with specific glue, I glued only one of them because it was taking a long time but really, it was because I was out of glue and believe it or not, the glue cost way more than this whole little cost effective DIY. We opted (starting to with "we" because the man of the house handled this part, I can be crafty but not that much !) for traditional screws as it was meant by the manufacturer.
Les étagères peuvent être collées sur le mur avec la colle pour bricolage, j'en ai d'ailleurs collé l'une d'elle mais, il faut savoir que cela prend énormément de temps et surtout que je n'avais plus de colle pour continuer : En sachant que la colle coûte plus cher que l'ensemble de ce projet ! Les autres étagères ont été visés et elles tiennent aussi bien que celle collée.

Length wise, It can fit 10-11 OPI bottles, 12 Essie or Chanel bottles. Depth wise, it can fit 2 rows of OPI and Chanel and a good 3 rows of Essie bottles. Going like that, It can fit a fairly good amount of bottles. I like to put the branded bottles I own the most to make it look prettier, and the other loner go behind those first rows.
En longueur, ces étagères peuvent accueillir 10-11 OPI, 12 vernis Essie ou Chanel. En profondeur, on peut y mettre 2 rangées d'OPI et de Chanel et 3 rangées d'Essie. On peut donc ranger une assez bonne quantités de vernis.
J'ai choisi de ranger les vernis de marque dont je possède le plus devant pour que cela soit un peu plus esthétique, les autres sont rangés derrières.
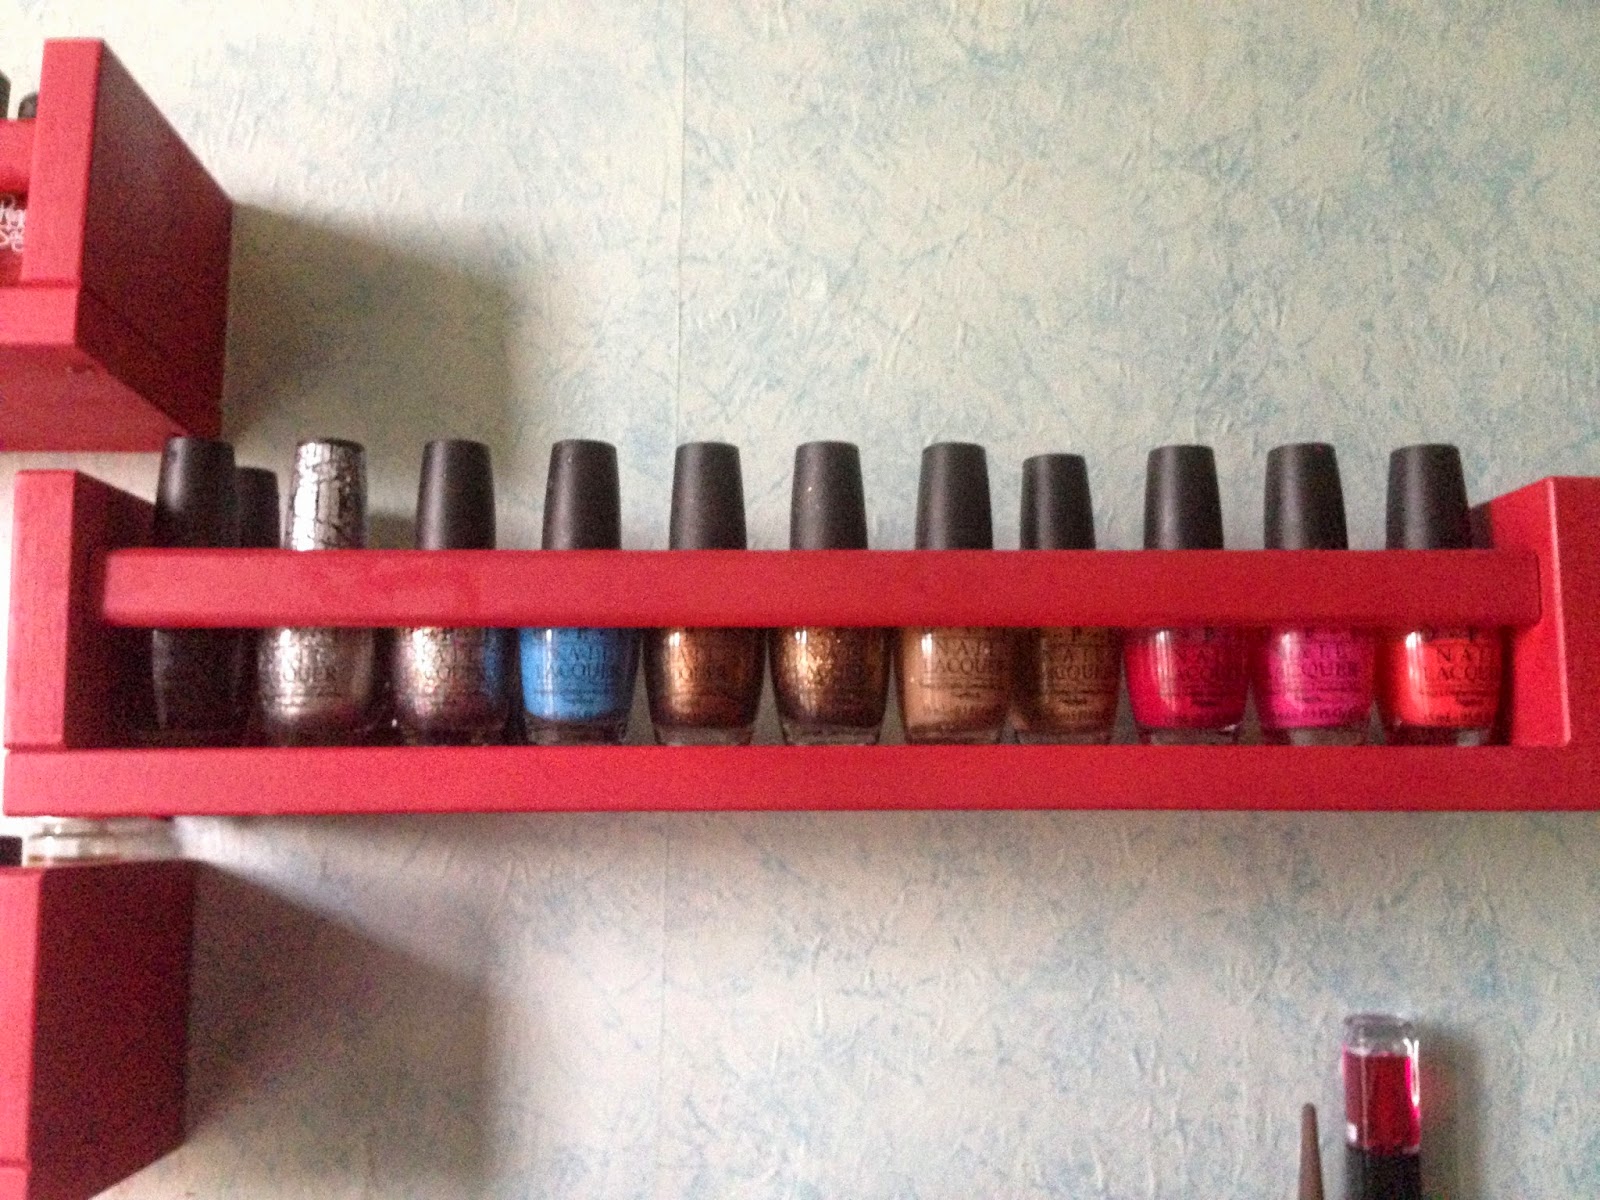

Note that this kind of arrangement can also fit taller bottles like that brown bottle and Loreal infallible nailpolish (or even Louboutin nailpolishes I guess).
There's another kind of shelf at Ikea which could fit bottles as well but it doesn't have a case surrounding the whole thing, meaning that -especially for clumsy people like me- the bottles are prone to falling from the front and from the sides.
Notez que ce genre de rangement peut également accueillir de plus grand bouteille comme le vernis Loreal infallible et le vernis marron à coté de celui-ci (je suis sûre que vous pourriez ranger les nouveaux Louboutin également).
Il y'a aussi un autre genre de rangement chez Ikea (blanc et long il me semble), mais c'est une étagère du style "ouverte" c'est-à-dire que les vernis sont plus susceptible de tomber qu'avec ce genre de rangement.

 Articles en Français |
  Articles in English


0 commentaires